Tuesday, July 31, 2012

I love projects that end well.

   As my title simply states.. I absolutely love when I start project (sewing ones in particular) and they end just as I would have liked or better. When I sew things, half of the time they don't end up working. So when something turns out great, I am super excited! Which explains how I feel right now!
   I was on pinterest today and I saw this pin. I really love this kind of style and so I was inspired to make something similar. Though, I drifted pretty far from my original idea, I am still really happy with the outcome! Basically I was planning on making the same thing but sleeveless and with a rounded peter pan collar instead of the pointed collar. But I ended up measuring badly and forgetting I was working with a not-at-all stretchy fabric and I had to make a few changes. You can see how it was a bit awkward and unflattering.. (This was before I added the bows on the front..)

   So after a little tweaking, this is what it turned into!  (and I decided to ditch the front bows.) Oh and don't judge me. I finished this pretty late and took these pictures around 4am here...

Shirt - diy
Shoes - Target & diy
Purse - diy
Watch - thrifted

   And I am pretty happy about the shoes as well! I have had these for years and I liked them but they really weren't my style.. But now I really love them :) And ps. I absolutely adore acrylic paint.


   Tutorial coming soon for the shirt! :) Tell me what you think of everything!

Monday, July 30, 2012

diy salt clay feathers

   I have wanted to do this project for a while now. In the past, I wasn't a huge fan of wearing jewelry but in the past few months I've been having fun with it. But spending $20 on one simple necklace isn't something I enjoy doing. So of course making it works wonderfully. Here is a recipe for salt clay that you can make with stuff around your kitchen. It's easy to use and cheap as well.
I used a knife before I realized foil would be easier.
So my oven's temperature is controlled with numbers 1-8 instead of normal degrees.. So I never know how to set the temperature correctly which caused me to burn these a little bit.

       The only tip I have is to wait a while to put in metal rings or anything to make them jewelry.. When I painted mine, they got a little softer which makes them easier to break.. I didn't wait long enough for it to dry completely and ended up breaking the earrings I was planning on making :/ But If you wait, I'm sure they will be fine!

   I am hoping to use some of these for a dream catcher and some other crafts. But we'll see! Let me know if you have any questions!

Friday, July 27, 2012

diy book page wallpaper

   Hello!
   It feels like it has been a while, though I think it has just been two or three days.. Despite the fact that I have very few people who actually follow my blog, I want to post regularly and often.. I had two projects planned that I wanted to post about but unfortunately they didn't turn out. Apparently mod podge doesn't work to hold together those cute doiley light fixtures and apparently you shouldn't trust me with a hammer and nails and some wood... But I had time to fiiinally finish my book page wall! I am so excited! :) So I thought I could use this as a post until I found a more creative and fun project.


   If you want to try it is super easy and cheap. I used four (and barely any of a fifth) old books which cost about 10-12 euros all together. And about 20(?) glue sticks. Which ya is alot... but it is easiest to find here and it's convenient and doesn't smell terrible. So in all I would estimate that I spent less than 20 euros.
   Here are a few tips...
    - Tear the pages out of the books and mix them together before you start. That way your wall has an even amount of pages from each book. Also, if you are planning on using pictures, place them all in a separate pile so you can add them when you see fit.
   -  Start from a corner. And stick with it. Go in rows horizontally from that corner and once a row is done just start from that corner again but below the pages you just did. If not, you will get little spaces like in the picture below. Not doing so won't end up being a huge deal I don't think, but it looks better not to.

   - Apply the glue on the pages rather than the wall.
   - For the edges simple use a sharp pair of scissors or a rolling blade. But for the pages near a corner or edge, apply the glue to the wall. That way your page won't stick somewhere you don't want it.

I have had the majority of the wall done for quite some time now and I haven't had any problems with it coming of or anything. Well I take that back. My sister is apparently a very violent sleeper; she has managed to take off a few pages while she sleeps. But for me, it hasn't been an issue. If you need to take it off, there will be a little bit of paper residue left but I think with some water and a sponge, it would come off easily.

Ya I know.. I hate that radiator :/
   I'm soo glad to finally be done with this :) Let me know if you try it out!

Tuesday, July 24, 2012

easy, no-crocheting, diy doily rug

    I have been wanting to make a rug for my bedroom for quite some time now. I have awful laundry room looking kind of tiles in my room and I hate them and I would love to cover them up as much as possible. I have started making rugs several times but either stopped cause they weren't working or simply cause I decided I no longer liked them. This doily rug that I made though is perfect! It doesn't exactly cover up the floor much but it is super cute and perfect for my room.
   I have seen doily rugs on pinterest before and I absolutely love them. But of course you have to know how to crochet and then you have to spend hours and hours making it.. And well, I am very impatient and so a doily rug always seemed to be out of my realm of capabilities. But after looking for different kinds of rugs I could make, I kept stumbling over the doily one. And then I had an idea of how to make a fake one! Of course it doesn't have the same charm and elegance of a real crocheted doily, but to be honest, my feet are just going to be stepping on it and making it dirty. Even if I had the skills, I wouldn't want to use them making a real doily for my feet considering how long it would take. So in my opinion, this alternative is perfect! :) And the best part.. It only took me about five hours! Which to me still seems kinda long but compared to the other rugs I have tried in the past, it's pretty good.


   Ok so the only thing you will need is a bunch of fabric and a sewing machine! You're going to start by making a base, and then you're going to wrap the base.
   For the base...
   It gets super messy (which is perfectly ok!) so I outlined what the shape is approximately so you could see it better. And all you do is sew a little line where they connect (the yellow lines in the picture).
   You can keep doing the same pattern or you can change it up however you would like! You can also change up the thickness of the strips to get different looks. Basically the only rule to follow here is to go by layers, starting from the middle.
   Ok so now that you have the base of your rug finished... (or before... as you can see in the last picture I was too impatient to wait :P but waiting is probably better in case you want to change something.) You are going to want to make a wholeee bunch of fabric strips. Mine were about an inch or so wide and 50 inches or so long.
   Once you have done that, you are basically going to use this knot over and over again to wrap the whole rug. I am not sure what the knot is called but here it is!
   I made this two colors so it was easier to follow but you will just use one strip! But ya, you just repeat that a million times and that's all it is! Super simple and easy. (and oops for messing up the numbering :/ )
   Again, go by layers, starting from the middle. When it comes time to switch from one loop to another, here is what I came up with that helped hold it together better...
   Once you're done with one strip, just knot the next strip over the ends so they are tucked inside. At the end you will have a few ends that poke out, just tuck them in somewhere.

   A little while later this is what you will have! :)

   If there is any confusion at all, ask as many questions as you would like in the comments. Let me know if you try it out! If you email me a picture, I'd love to share it on here!


Linky parties: Homemaker on a Dime; Serendipity and Spice; Alderberry Hill; Lines Across; Sumo's Sweet Stuff; Craft-O-Mania; I Heart Nap Time

Sunday, July 22, 2012

My table/desk project

    Hello! :)
   As I mentioned in my last post, yesterday I got this table/ desk from a thrift store and I wanted to restore it and make it new again! So here is me simply showing you how I did that :)
   So ya. It started out just plain ugly. It is actually a desk but the drawer was missing so I am simply planning on using the back as the front and just live without having a drawer. But ya. It was full of dirt and stains and three coats of paint. But for 6 euros I figured it would give me something to work on.
   My dad so kindly helped me with the majority of removing the paint. Which was pretty time consuming.
   Then after I washed it really well and then gave it two coats of a stain we had left from another project!
And that's it!


I'm not quite sure exactly how I will use it in my room but I'll figure out something! I placed the two canvases on it to give it some color along with the vases I bought yesterday. I'd like to get a cute little chair to use with it so it can be a little desk area. But for 6 euros I'm pretty pleased!

Saturday, July 21, 2012

A day with my daddy :)

   So today I had a really great day! As I have mentioned before, my mom is off far away in Texas and my sister is at camp, so me and my dad are here by ourselves at our house. It being Saturday and my dad not working, we spent the day together.
   First off let me say that I have the best daddy in the entire world. He is the most loving, Godly, generous and selfless person I know. I am so thankful for having a dad like him. Just thought I should say that! He deserved some props after the fact that he gave up his Saturday for me ;)

   First off, I wake up to him coming into my room with 2 "pain au chocolat"s (or chocolate croissant thingys as I would say in English). Which was really sweet. I'm going to miss these heavenly croissants when I'm in Texas.
      Then we both went to a store called Emmaus. In France they don't really have many thrift stores and such but this store is the closest they have (and the only one I have seen). But goodness do I love it. They have absolutely everything there. If I had the money and an infinite amount of space, I'm sure I would buy half of the things there. But anyways. So my dad happily went there with me and waited patiently while I spent forever looking around and deciding what to buy.
   I absolutely love walking out of these kind of stores and feeling like you just found a million little treasures. Here's what I got today!
1. two little vases I'll use somewhere in my room - 1.50 €
2. the last book I'll need for my book page wall - 1€
3. an adorable watch (that you can't really see cause of how bright it is) - 5€
4. a pretty pin I would like to use as a necklace - 2€
5. and an odd, big safety pin with a bunch of charms. (not sure exactly how I'll use it but I'm sure I'll figure out something!) - 1€
6. and last but not least, this table for 6€.
As you can see it looks pretty awful. But I wanted a project and this was perfect! The top is orange and cream and it has an old/ retro ish kind of look I guess. My imagination helped me go through with buying it since there is really nothing very appealing about this thing. 
   
   So back to how great my daddy is. After we went home, he spent the entire evening helping me remove three coats of paint off this little nightmare of a table! If it wasn't for him I would have been at it for a week at least. Right not the table is just about finished. Hopefully my next post will be about its transformation (:

  Basically it was a pretty great day :)

Ps... I have now had 1,000 views of my blog since I started it last month! I know this really isn't much of an achievement but for me it is one none the less :)


Thursday, July 19, 2012

diy recipe book

   I was on bloglovin' the other day and I saw this recipe book from A Beautiful Mess. I thought it was super cute and it looked fun to make. Unfortunately I don't cook at all. I am terrible at it. Though, I do have a few recipes that I always look at in my mom's cookbooks. I was thinking since once I leave in a few months I won't be able to look at them anymore, that that makes a good enough reason to make this cute little book :)

 I ended up using an old notebook and I just covered it with some magazine pictures I found, instead the way they did it in the recipe book I pointed out earlier. 
 I thought the tabs looked really cute but unfortunately the only thing I ever make are sweets haha soo instead of having the common categories, I just made them the ones that I use the most. Even if they are pretty much the only ones in there at this point :P
So ya :) lots of paper, glue and tape, a few pictures and voila!
   Most of them were recipes that I copied by hand but I added some stuff from magazines as well.

  I'm hoping to keep adding to it and someday end up with a super cute, full and handmade recipe book. I'm really happy with mine and it would be a really cute homemade gift! You should try it out :)


Tuesday, July 17, 2012

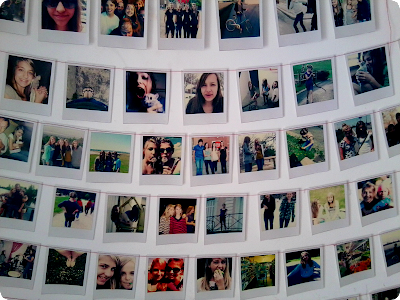
diy photo garland

   So this is yet another project for my room! I'm hoping to have a lot of pictures in it but not the traditional pictures in frame kind of thing. So here is what I'm doing!


 Just start out by sewing and pulling the thread in the back so you have enough to hang it with. Then just feed in a picture! For switching pictures, all I did was wait until the end of the picture was no longer under the foot, then I kept lightly pulling it while adding in a new picture. It's pretty simple! :)
Oh and if it isn't obvious, these are not real poloroid pictures (sadly...) But I used a poloroid frame in PicMonkey to make these. Just in case you would like to do the same!


Monday, July 16, 2012

diy state string art countdown / going home! (:

   So if you have read my about me page, you know that I am from Texas but have moved to France a little over a year ago. Well my parents and I are planning on sending me back over there in April of next year for my senior year and for college. I am probably just about the most excited person in the world! I am absolutely ecstatic about seeing my friends again! C:
   I have always been big on countdowns. Don't ask me why, I just like them. So this event most definitely deserves a countdown in my book. I made this actually a few weeks ago, before I started this blog. Originally I was using chalk to write the numbers, but it was already starting to stain the board white and so I decided I needed another option. So last night I got some card stock and paint and ended up with these! Personally I think it is much cuter and more practical.
   There are several tutorials that I have seen through pinterest on how to do the string art part but if you'd like to try and have any questions as to how I did it, feel free to ask! Oh and be creative! You could easily switch out the Texas shape for something that has to do with a vacation, wedding, birthday, or a baby's due date incase you aren't moving back home after two years like me ;)


 My poor sister... She has a bit more to go than me... But considering that we share a room, I figured it would be better to make her a countdown as well.